
Sometimes I pick up new hobbies.. a bit too quickly. I’m going to blame my parents for this – they were either too supportive of me whenever I wanted to try something new, or they set the example by always being up for learning new skills. 😛
An example: when I was in junior high I was really into a series of fantasy books where one of the characters was a glass mage. So when my mom and I found a kit for lampworking (melting glass), we got it. When we brought it home, my dad insisted on trying it first because he didn’t think it was the best idea for me to use a blowtorch on my own.. 😂 Well, glass bead making turned into a several year hobby for my dad. My mom and I would turn the beads into jewelry, and all three of use would sell our creations at the local French markets for a few years. There’s even small (vented) room in our basement still dedicated to a lampworking station and supplies. 🙂
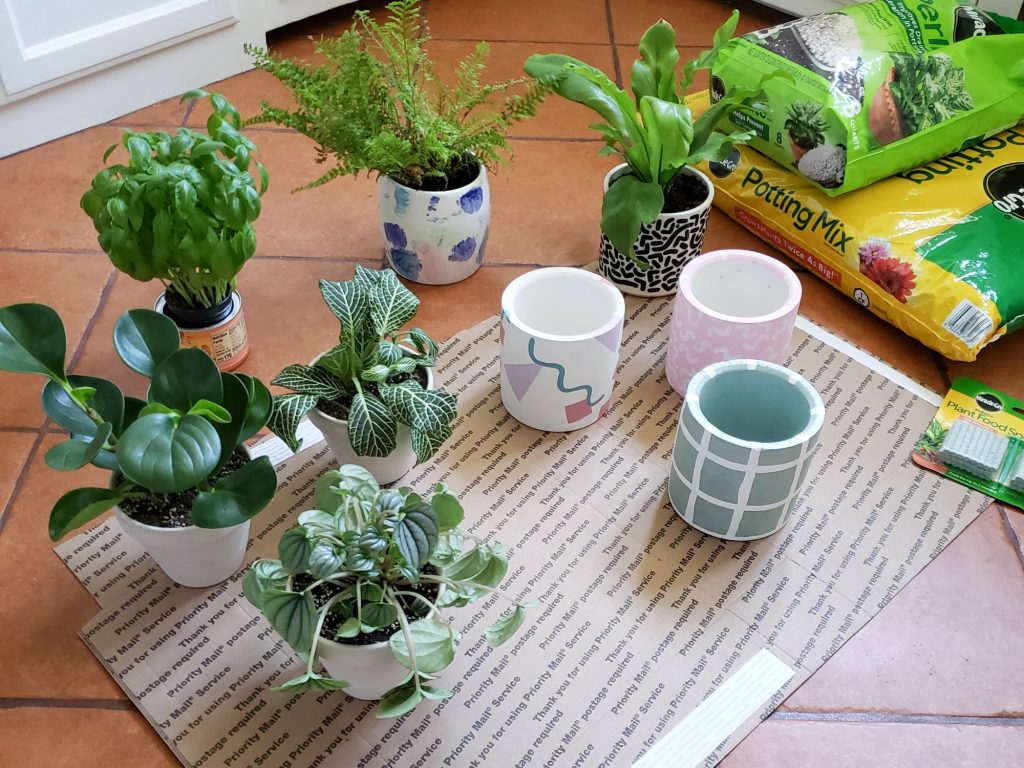
Anyway. This summer before my birthday, I got served an ad on instagram for a shop selling silicone molds to make cement planters. The shop turned out to be a scam (the prices were way too low compared to other places, and apparently they never actually fulfilled purchases), but I got a bit obsessed with the idea. I had been having trouble finding the “perfect” planters that had drainage holes, a dish and a design I liked, so the ability to make my own seemed great.
After a ton of research, here’s what I ended up buying (as a birthday gift to myself, of course):
Concrete:
- Easy Make Concrete Kit from Concrete Concrete
- Mint and Pink Pastel Coloured Matter from Concrete Concrete
- White and Black Classic Coloured Matter from Concrete Concrete
- Jennifer’s Mosaics Indoor Stone Cement (20lb) from Dick Blick
Molds:
- 12cm Silicone Pot Mold from PINKIEMOLD – at the time, this was the largest cylinder planter mold they sold with drainage holes
- Round Concrete Tray Mold (Design 4) from PINKIEMOLD – at the time of purchase, the listing for the planter didn’t show the matching dish size so I picked one separately
- Creative Design Tray Mold (Size 4) from PINKIEMOLD – I got this as a way to use any extra cement I might mix. I thought it’d be good for both coasters and trinket dishes
Micellaneous:
- Acri-Soy Penetrating Concrete and Wood Sealer from Amazon – I wanted a non-toxic sealer because I thought that would be healthiest for the plants, and best if I wanted to plant something edible in the pots
- Finishing Wax from Concrete Concrete
Mixing and pouring the concrete:
In general mixing concrete should probably be done outside. I ended up doing it inside with windows open and a powerful air filter on high since it was the only way I’d have access to water if I needed more. I also recommend wearing a good quality mask – it’s not safe to breathe in concrete dust.
I first followed the step-by-step video by Concrete Concrete using the starter kit. Eventually I switched to following this tutorial using Jennifer’s Mosaics Indoor Cement. The main differences between the two was the consistency – I found that the thick “pancake batter” consistency, which was thinner than the Concrete Concrete recommendation, helped to minimize air pockets in my finished pieces. My main tips for the mixing and pouring stage:
- The mixing method that had best results for me was to add a bit of water to the cement, and scrunch it up with my (gloved) hand until all of the cement was moistened. Then I’d add more water, and eventually switch to using a wooden dowel to stir.
- Make sure you have a large enough container to mix in, where you won’t have to worry about being too careful not to spill anything (I accidentally used too small of a pail the first time, and because I had to be a bit careful not to spill, I worked too slowly and the cement set in the pail 😐 )
- I tried the method for estimating the amount of concrete to use in the Jennifer’s Mosaic’s video and didn’t really come out with an accurate result. I really just ended up mixing more than I needed/mixing the cement for the pot and dish separately, and sometimes (quickly) mixing more as I went
- Work quickly, and stir the concrete/water mix often.
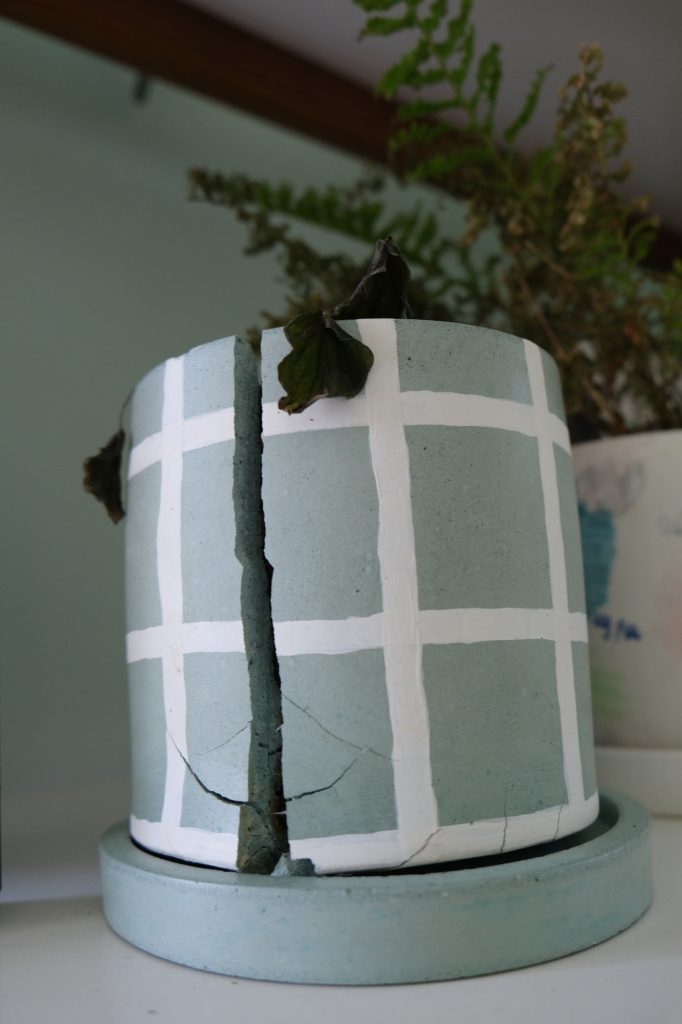
- Be wary of mixing brands of concrete. I’ll show photos later on, but the mint pot where I combined green from Concrete Concrete and the white from Jennifer’s Mosaics ended up splitting.
- Make sure the molds are level as the concrete sets! Even with a power sander it was difficult to level the bottoms out (especially with the Concrete Concrete brand material)
- Don’t overfill the molds, for the same reason above. I was able to solve protruding bottom edges with the power sander, but it would’ve been easier to just not fill the molds so high.
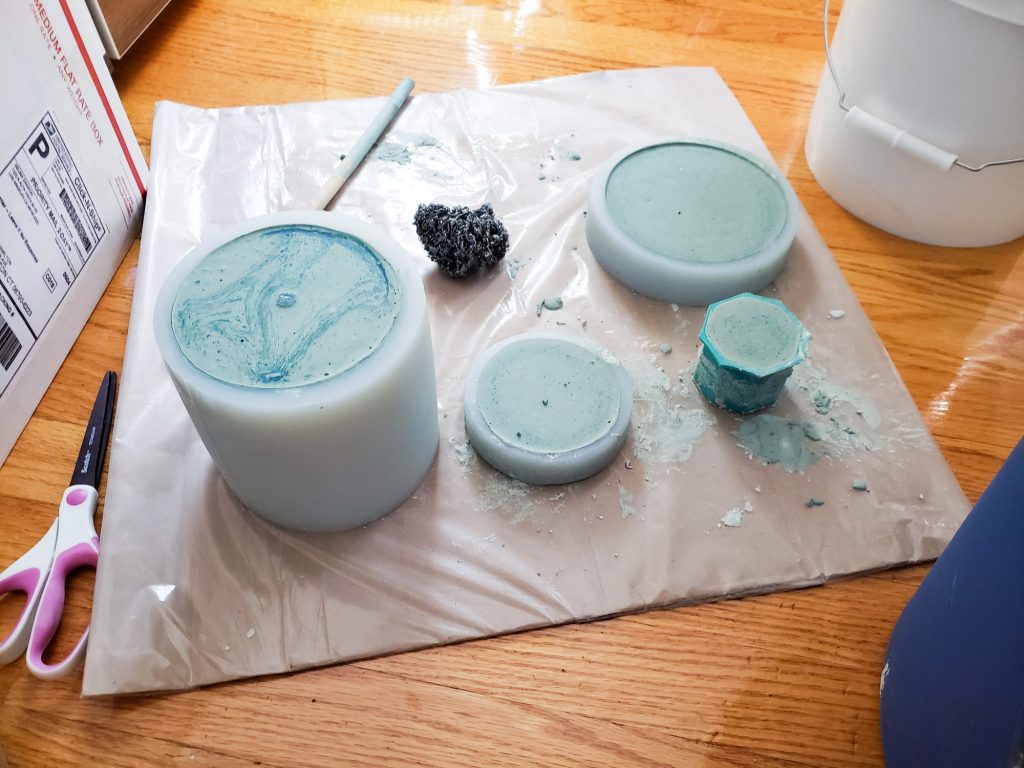
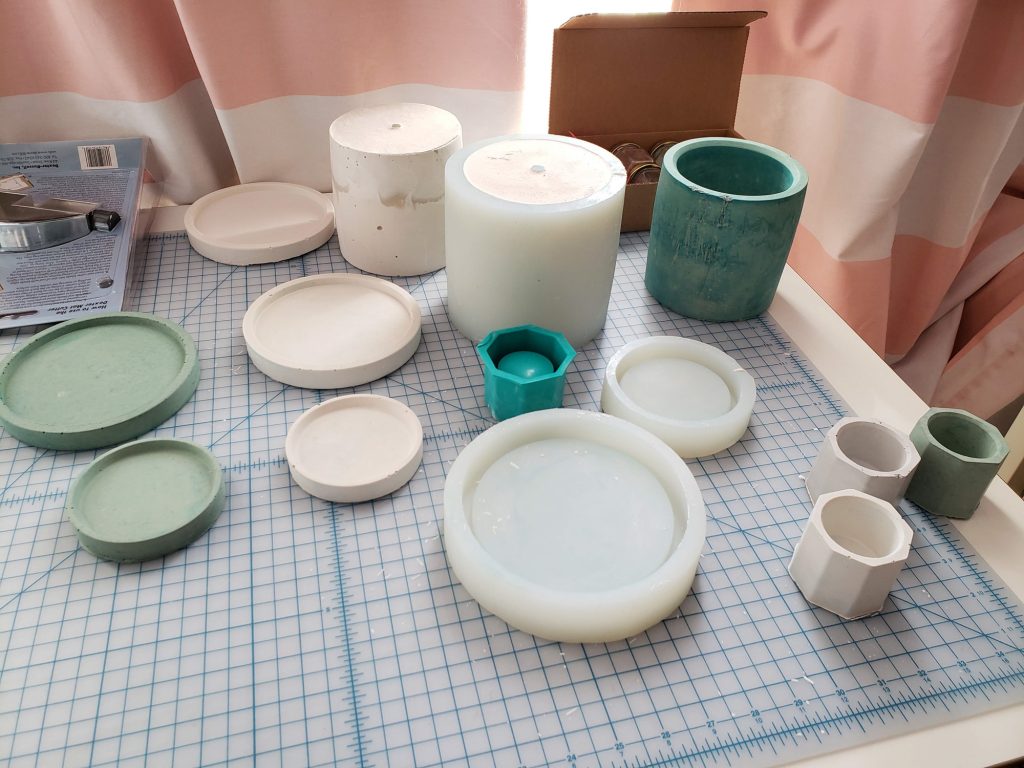
Removing the concrete pieces and prepping them:
Everything was very easy to remove *except* the large planter. It took a while to figure out how to de-mold the first one. There might be a better method, maybe involving vaseline or something.. but here is how I removed all three of my pots:
I stuck three butter knives down the outside edge of the mold, spaced evenly (being careful not to poke too far down and damage the mold), which created enough space for air so that I could slowly wriggle/twist the pot out. I’m sure anything thin and long would work in place of the butter knives, but those were just what I had on hand.
After they set for a day, I took them outside (again with a really good mask with a seal and meant for fine particles), and sanded the bottoms of all of my un-level pots and dishes. This felt pretty tedious so I really recommend just making sure the molds are level when you first pour the cement. 😐
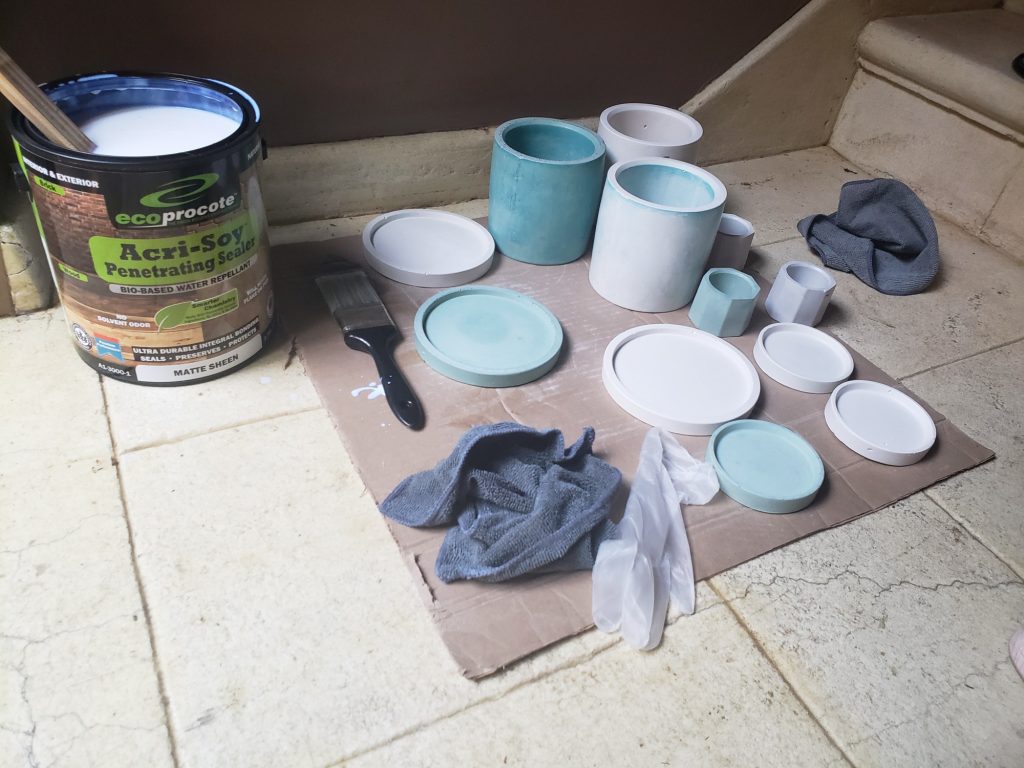
Sealing the concrete:
I have no idea why, but the first time I tried to seal the cement pieces I did it outside and paid dearly for it with a ton of mosquito bites. The sealer is actually non-toxic and made to be used for things like countertops, so the next time I worked with it I just did it indoors.
I don’t actually know if this is the best sealer for the job – all I can say is that it does seal the cement to a degree.
The method I found that worked for me:
- Have two rags – one to use with water, and one to use with the sealer. Also wear gloves!
- First soak the rag with water, and then soak the cement piece until you see the cement change color with moisture. Soaking the cement with water helps draw the sealer into the cement. (The first time I did this I didn’t soak with water first, and the sealer didn’t get drawn in at all. I ended up having to sand the sealer off so that I could start over again.)
- Then rub the sealer onto the cement piece, making sure not to leave a film or thick coating.
- I let the sealer dry for an hour or two (I forget what the directions say), then I repeated the process with soaking the piece in water, then applying the sealer. I can’t remember if I did this process 3 or 5 times.. but each time you soak the cement with water, you should see that less of it changes color from the moisture, which means the sealer is working.
- I repeated the water/sealer process until wetting the cement piece didn’t really change the color anymore, and the water stayed beaded on the surface rather than soaking in.
One silly choice I made (I’ll show the consequences later), was to only seal the inside of the pot, and about an inch of the top and bottom of the outside of the pot. My reasoning was that, if moisture were to get into the cement from the plant/soil inside, it could dry out from the outside (I think this wasn’t the best choice).
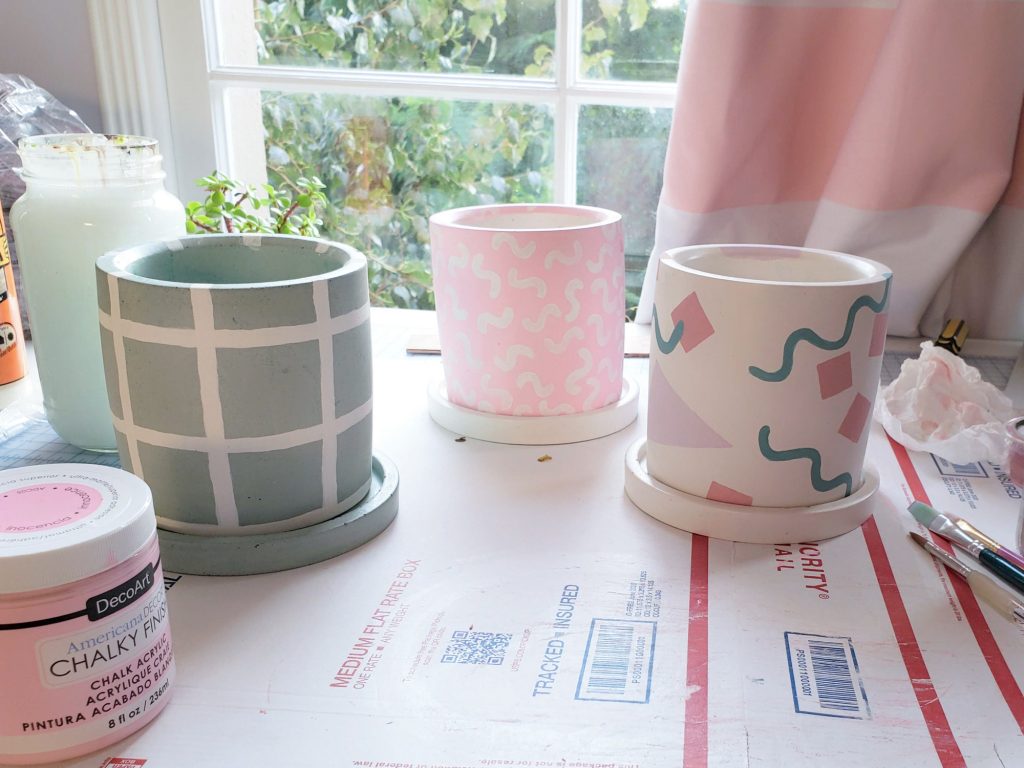
Painting and finishing the pots:
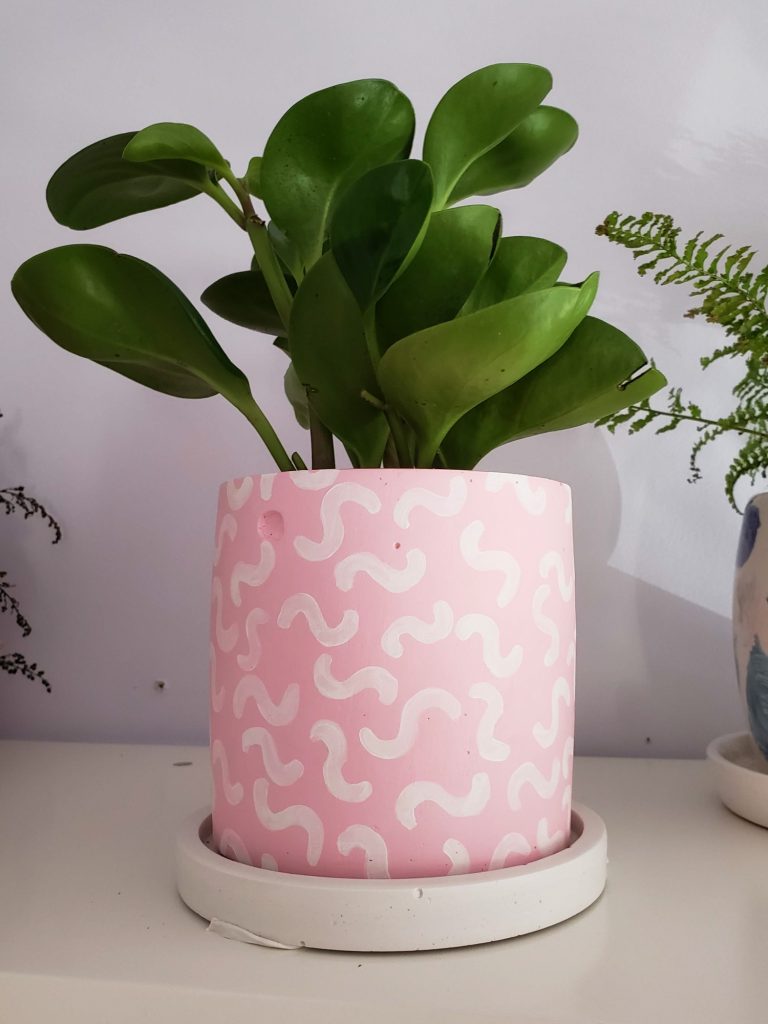
I used chalk paint to add designs to the pots. This was cute at the time, but after keeping plants in the pots for a month, I think I’d either try a different type of paint or just not bother with it, unless I found a sealer that prevented moisture from getting to the paint from the cement. The worst of these three was the pink pot in the middle below where I covered the entire pot with paint – the cement/paint/moisture interacted weirdly.
After painting the pots, I used the finishing wax from Concrete Concrete to go over everything, then buffed it with a microfiber cloth. I’m not 100% sure this did much haha.


How the pots were after a month:
First, don’t judge the pots by the health of the plants. I’m still very early in my plant-mom career and I’m pretty certain the plants’ condition was more to do with me not watering them during our 108 degree heat wave than it was with the quality of the pots. 😬Anyway, how each pot turned out:
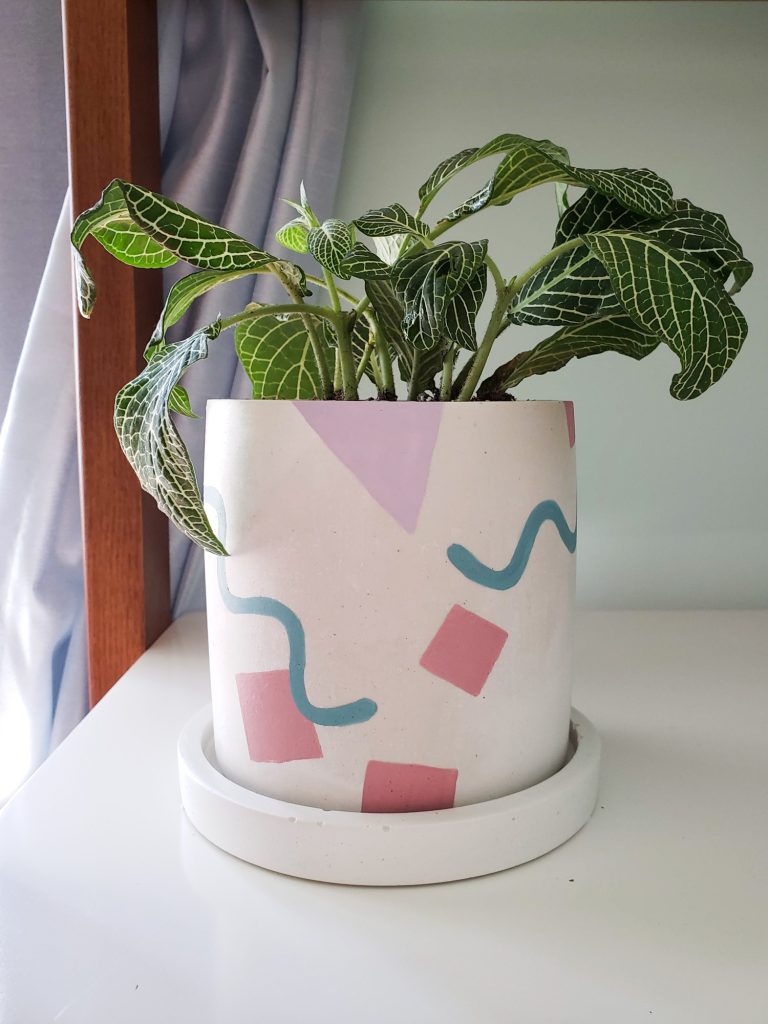
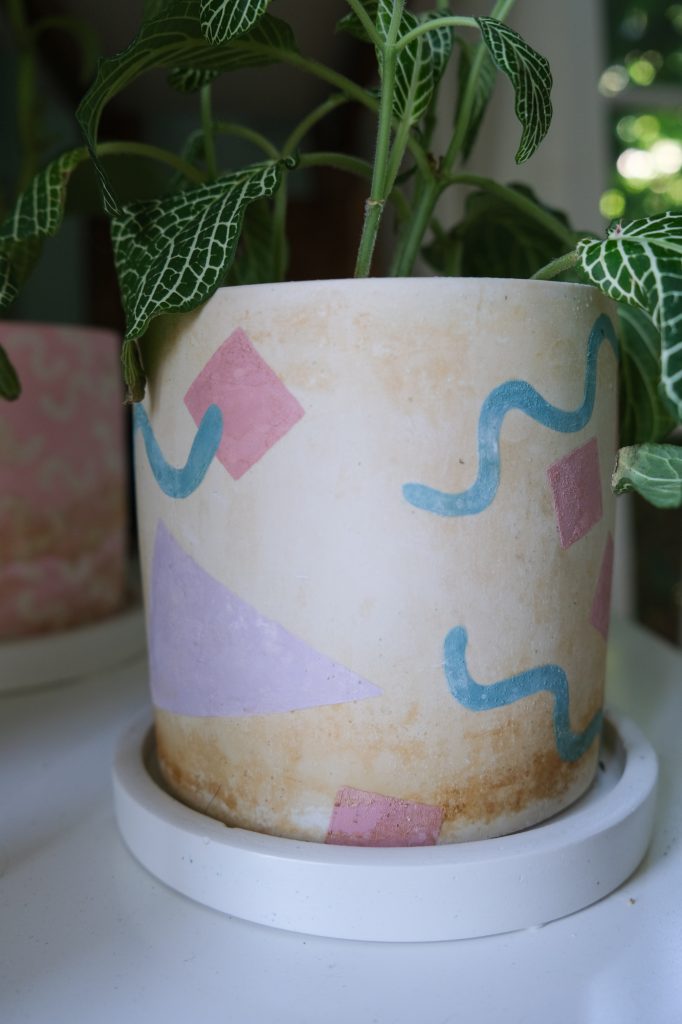
- The pot with the white base (using Jennifer’s Mosaic) and painted memphis design turned out the best. I think that sealing the entire outside would’ve kept it looking pretty good overall and hopefully helped avoid the orange discoloration.
- The mint pot with white design split! This one was the mix of Concrete Concrete and Jennifer’s Mosaic. The paint on this one though looked the best! The pot also had no discoloration.
- The all-over chalk paint pink pot (using Jennifer’s Mosaic) turned out a bit gross looking.. something about the paint seems to have interacted poorly with the moisture and cement.
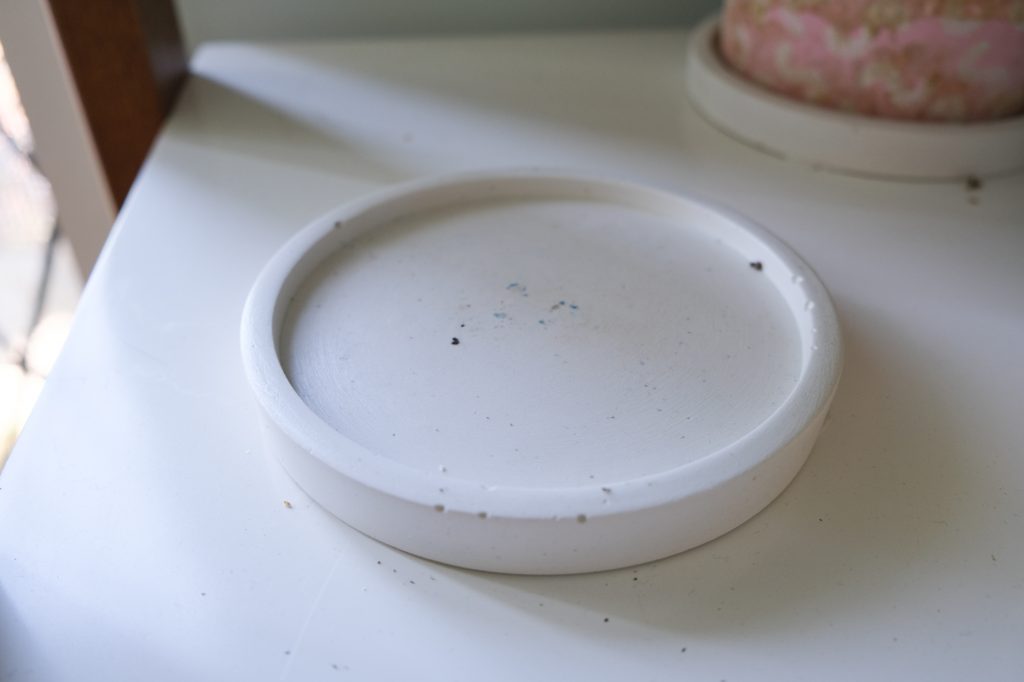
- All of the dishes turned out fine! I wonder if it’s because they weren’t exposed to as much constant moisture as the pots, or if it’s because I sealed the entire surface?


The dishes were fine! I wonder if it’s because they weren’t exposed to as much constant moisture as the pots, or if it’s because I sealed the entire surface?

Thoughts on what I’d try differently:
- I’ve seen some people say they don’t even seal their concrete pots – I wonder if that would work better than the sealer I used?
- I wonder if a different paint would’ve reacted better than the chalk paint?
So that was my adventure with cement! I think the process would actually be pretty simple once you figure a few things out, and I hope that describing some of the mistakes I made along the way will help save someone else some time.
I’m actually passing along my cement supplies on to a friend. It’s not because I didn’t enjoy working with cement – I just remembered that I have other hobbies I’d like to focus my time on more like sewing and working with the laster cutter haha. I don’t regret trying it out though! I got it out of my system and learned a bit about a new material along the way. 🙂
Disclaimer: I am not an expert on working with cement. Please read and follow all safety precautions of the materials you choose to work with!